
Java as a language has been the choice of a lot of enterprise application developers because of its rich ecosystem and the tools it offers for seamless web application development. In the Java Web Applications eco-system, Spring has been the major player and the most popular choice among developers. Developing a Spring REST API nowadays is very easy and you could have a basic REST API up and running locally, in no time. But the point most developers gets stuck is when deploying the application. There are so many different options and methods, like using a VPS, Docker or the new kid on the block, Kubernetes. If you value the scaling and using the most cutting edge technology when deploying, Kubernetes would be the go-to choice. But deploying in Kubernetes without any assists is a very hard task, there are a lot of things to go through a significant amount of knowledge about Kubernetes is needed.
What if there is a way you could deploy your Spring Boot application in a managed kubernetes cluster easily which offers a lot of state of the art dev-ops and API-Management related features ? That’s where WSO2’s Choreo comes in !
Choreo is a integration platform as a service which enables you to deploy and manage your applications without the burden of creating a platform which consists of deployment environments, dev-ops pipelines, ci-cd and etc.
You could utilize Choreo and its many features to deploy and manage your Spring Boot application effortlessly. So without further ado, let’s get into it.
Creating a Simple Spring Boot Application
I would use Intellij-IDEA Ultimate as the IDE in this article. Also I would use Java 17 and Spring Version 3.3.1.
First, you need to create a spring project using file->new->project->spring and then enter your project details.
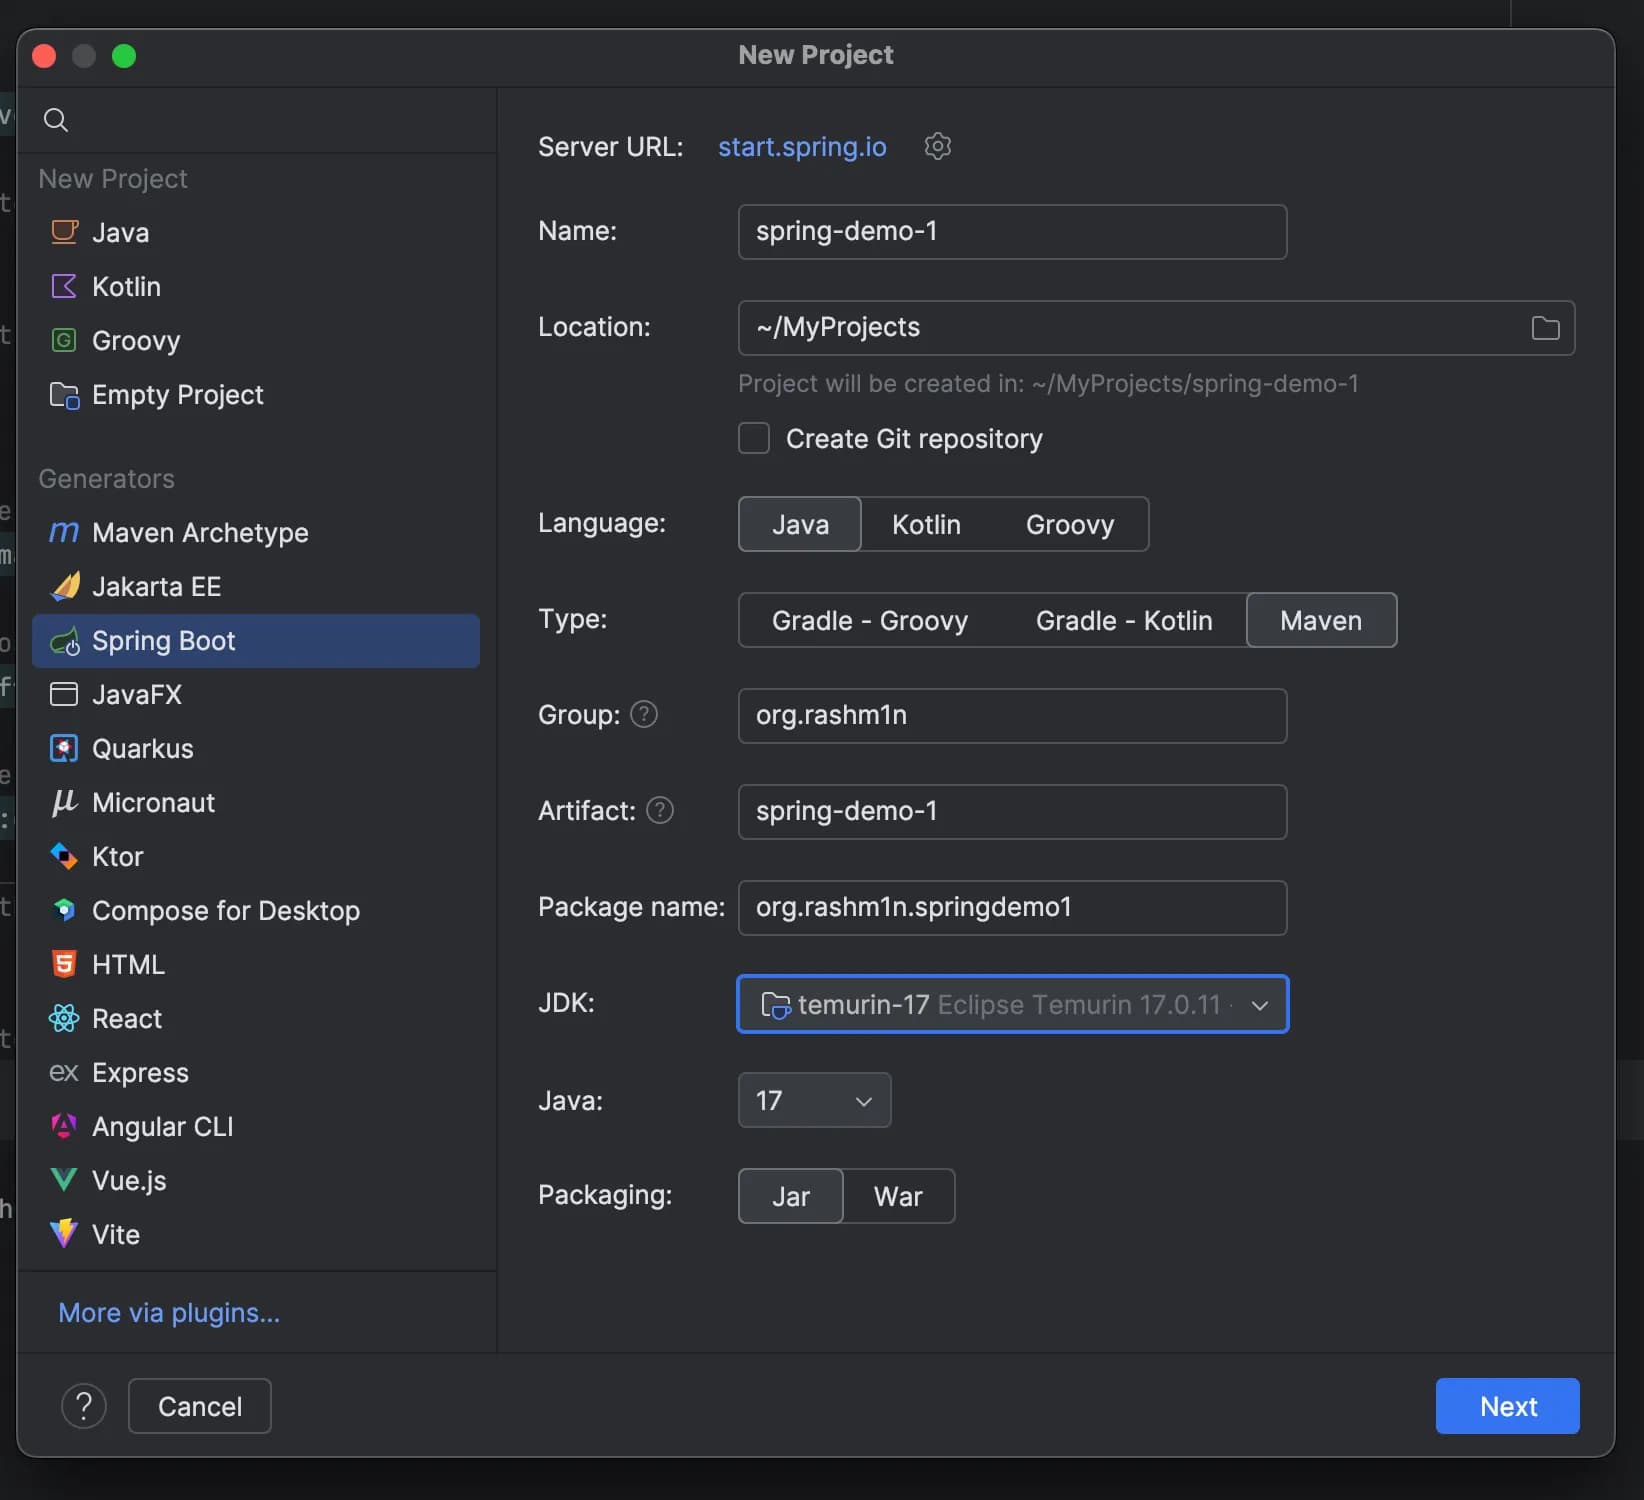
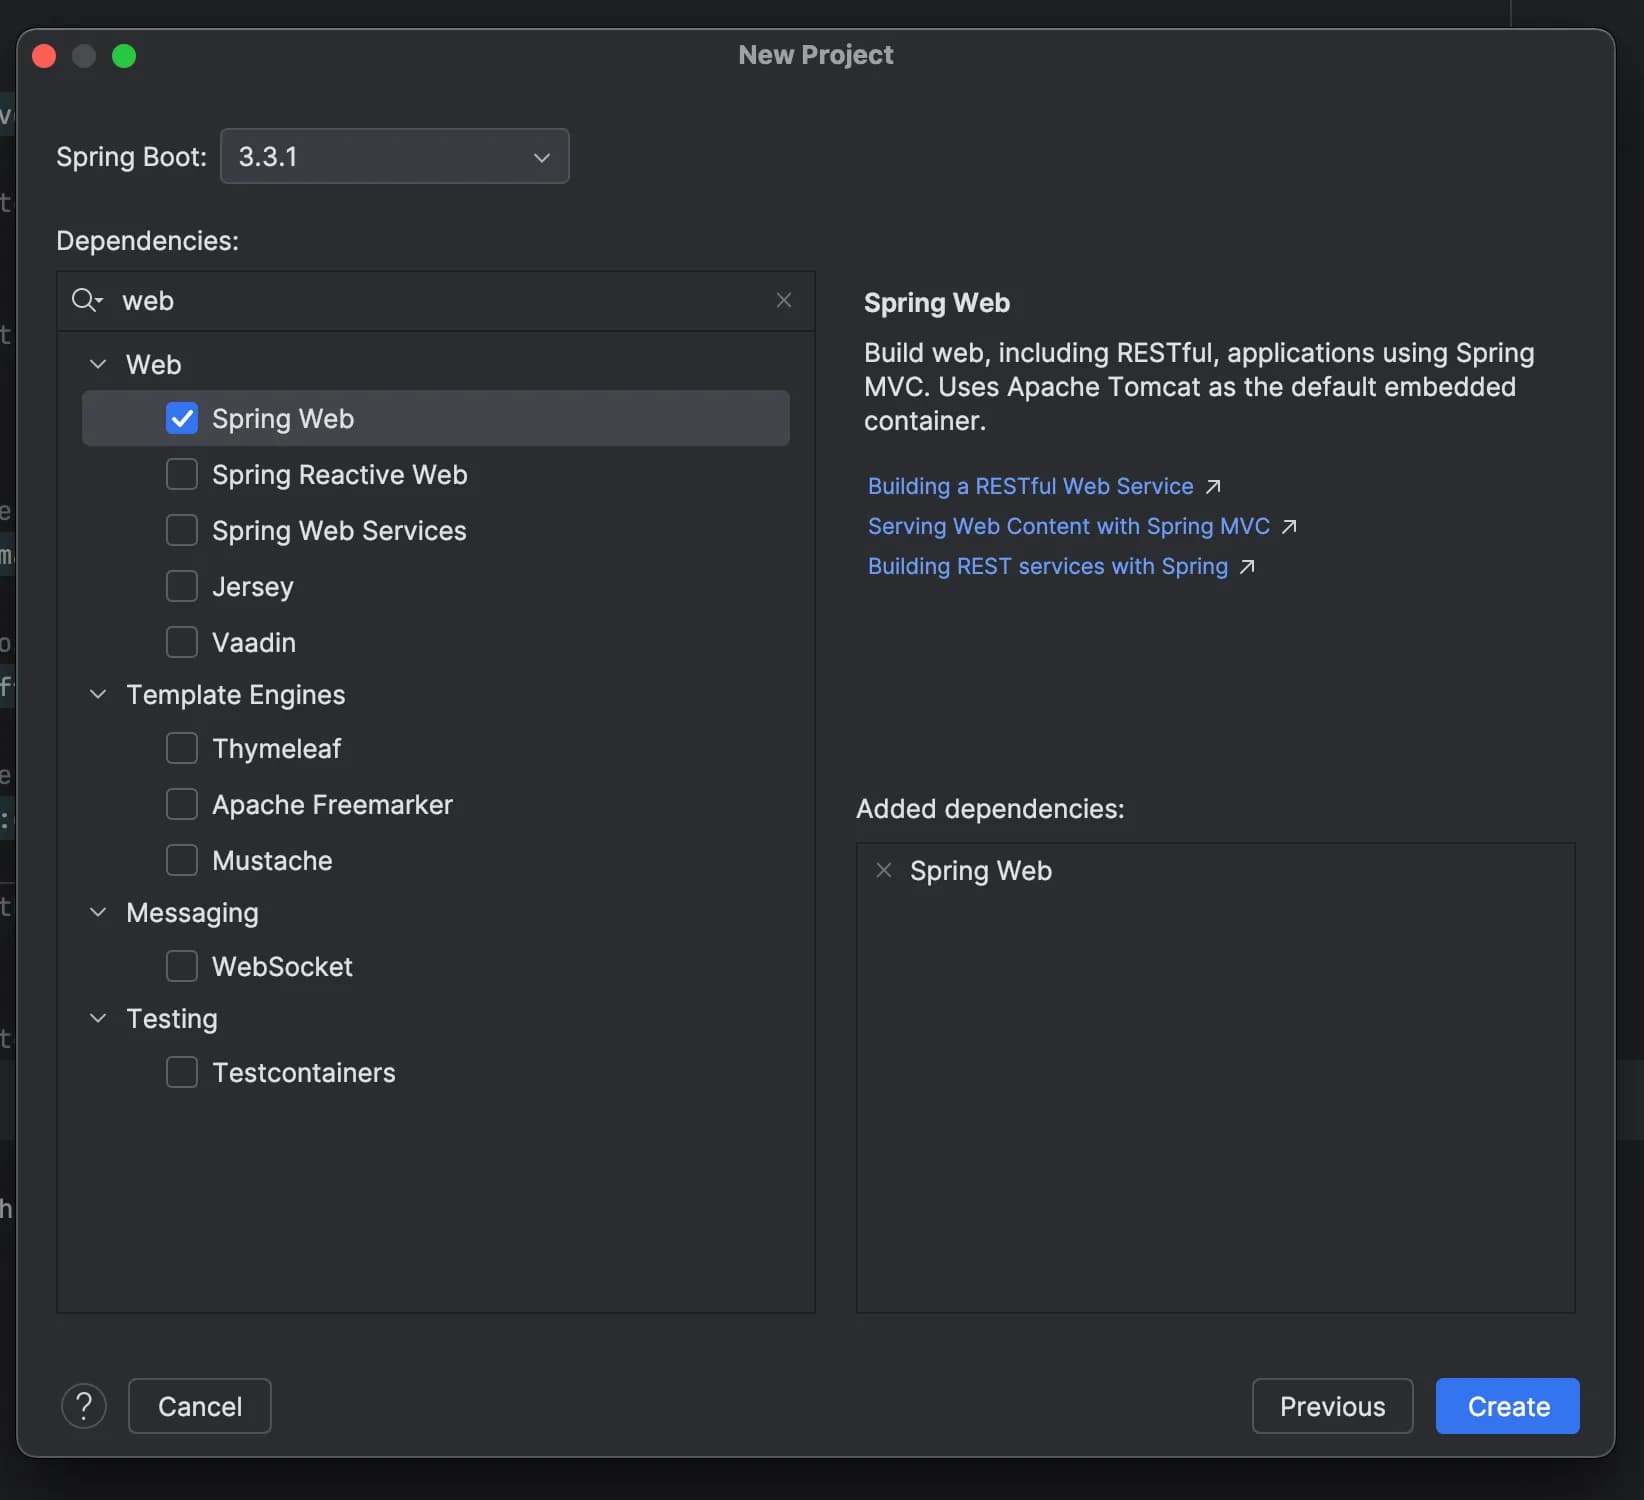
After that click next and chose the dependencies you want to add, I would just add spring-web as the dependency. Then click create project and you’d have a basic skeleton of your project.
If you are not using the IntelliJ IDEA, you could use Spring Initializer and download the resulting zip file and open it with your preferred IDE.
Please find the resulting pom.xml file below.
<?xml version="1.0" encoding="UTF-8"?>
<project xmlns="http://maven.apache.org/POM/4.0.0" xmlns:xsi="http://www.w3.org/2001/XMLSchema-instance"
         xsi:schemaLocation="http://maven.apache.org/POM/4.0.0 https://maven.apache.org/xsd/maven-4.0.0.xsd">
    <modelVersion>4.0.0</modelVersion>
    <parent>
        <groupId>org.springframework.boot</groupId>
        <artifactId>spring-boot-starter-parent</artifactId>
        <version>3.3.1</version>
        <relativePath/> <!-- lookup parent from repository -->
    </parent>
    <groupId>org.rashm1n</groupId>
    <artifactId>spring-demo-1</artifactId>
    <version>0.0.1-SNAPSHOT</version>
    <name>spring-demo-1</name>
    <description>spring-demo-1</description>
    <url/>
    <licenses>
        <license/>
    </licenses>
    <developers>
        <developer/>
    </developers>
    <scm>
        <connection/>
        <developerConnection/>
        <tag/>
        <url/>
    </scm>
    <properties>
        <java.version>17</java.version>
    </properties>
    <dependencies>
        <dependency>
            <groupId>org.springframework.boot</groupId>
            <artifactId>spring-boot-starter-web</artifactId>
        </dependency>

        <dependency>
            <groupId>org.springframework.boot</groupId>
            <artifactId>spring-boot-starter-test</artifactId>
            <scope>test</scope>
        </dependency>
    </dependencies>

    <build>
        <plugins>
            <plugin>
                <groupId>org.springframework.boot</groupId>
                <artifactId>spring-boot-maven-plugin</artifactId>
            </plugin>
        </plugins>
    </build>

</project>
Adding the Controllers, Services and Repositories
After the dependencies and downloaded an indexed, we could finally get to some coding. Here, I would create a simple CRUD REST API which persists a resource named “Demo” in a temporary map.
First let’s create the model and the repository to persist that model. Inside the repository I would not be creating a database connection for the simplicity and just use a temporary map.
package org.rashm1n.springdemo1.model;

public class Demo {
    private Long id;
    private String name;

    // getters, setters and all args constructor
}
package org.rashm1n.springdemo1.repository;

import org.rashm1n.springdemo1.model.Demo;
import org.springframework.stereotype.Repository;

import java.util.*;

@Repository
public class DemoRepository {
    private Map<Long, Demo> demos = new HashMap<>();
    public Demo getDemo(long id) {
        return demos.get(id);
    }
    public List<Demo> getAllDemos() {
        return new ArrayList<>(demos.values());
    }
    public void addDemo(Demo demo) {
        demos.put(demo.getId(),demo);
    }
    public void updateDemo(Demo demo) {
        demos.put(demo.getId(),demo);
    }
    public void deleteDemo(long id) {
        demos.remove(id);
    }
}
After that we need add a service to access the created repository.
package org.rashm1n.springdemo1.service;

import org.rashm1n.springdemo1.model.Demo;
import org.rashm1n.springdemo1.repository.DemoRepository;
import org.springframework.beans.factory.annotation.Autowired;
import org.springframework.stereotype.Service;

import java.util.List;

@Service
public class DemoService {
    private final DemoRepository demoRepository;

    @Autowired
    public DemoService(DemoRepository demoRepository) {
        this.demoRepository = demoRepository;
    }

    public List<Demo> getAllDemos() {
        return demoRepository.getAllDemos();
    }

    public Demo getDemoById(Long id) {
        return demoRepository.getDemo(id);
    }

    public Demo saveDemo(Demo demo) {
        demoRepository.addDemo(demo);
        return demo;
    }

    public Demo updateDemo(Demo demo) {
        demoRepository.updateDemo(demo);
        return demo;
    }

    public void deleteDemo(Long id) {
        demoRepository.deleteDemo(id);
    }

}
Finally to expose the service to the external users, we need to create a Controller annotated with @RestController
package org.rashm1n.springdemo1.controller;

import org.rashm1n.springdemo1.model.Demo;
import org.rashm1n.springdemo1.service.DemoService;
import org.springframework.beans.factory.annotation.Autowired;
import org.springframework.http.ResponseEntity;
import org.springframework.web.bind.annotation.*;


@RestController
@RequestMapping("/api/demo")
public class DemoController {
    private final DemoService demoService;

    @Autowired
    public DemoController(DemoService demoService) {
        this.demoService = demoService;
    }

    @GetMapping("/{id}")
    public ResponseEntity<Demo> getDemo(@PathVariable long id) {
        Demo demo = demoService.getDemoById(id);
        if (demo == null) {
            return ResponseEntity.notFound().build();
        }
        return ResponseEntity.ok(demoService.getDemoById(id));
    }

    @PostMapping
    public ResponseEntity<Demo> createDemo(@RequestBody Demo demo) {
        demoService.saveDemo(demo);
        return ResponseEntity.ok(demo);
    }

    @PutMapping
    public ResponseEntity<Demo> updateDemo(@RequestBody Demo demo) {
        demoService.updateDemo(demo);
        return ResponseEntity.ok(demo);
    }

    @DeleteMapping("/{id}")
    public ResponseEntity<Void> deleteDemo(@PathVariable long id) {
        demoService.deleteDemo(id);
        return ResponseEntity.ok().build();
    }
}
With this step, our simple spring boot application is finished. You could find the link to the github repository at the end of the article. In the end the directory structure would look like this.
├── pom.xml
├── src
├── .choreo
│   ├── component-config.yaml
├── main
│   │   ├── java
│   │   │   └── org
│   │   │       └── rashm1n
│   │   │           └── springdemo1
│   │   │               ├── SpringDemo1Application.java
│   │   │               ├── controller
│   │   │               │   └── DemoController.java
│   │   │               ├── model
│   │   │               │   └── Demo.java
│   │   │               ├── repository
│   │   │               │   └── DemoRepository.java
│   │   │               └── service
│   │   │                   └── DemoService.java
Now you could start the application by using the following command.
mvn spring-boot:run
Creating a Choreo Component
Now let’s get to the fun part ! After testing the application locally, let’s deploy it in the cloud !
First of all, you would need to push your project to Github, for it to be accessible to the deployment pipelines. Then we need to create a Choreo Developer Account for free by navigating to Choreo Consle. You could login with email, Google or Github , use whatever comfortable to you. Then provide a organization name and move forward. Then create a new project providing a name and a description.
After creating the project, we need to commit a Choreo related file to your repository to the .choreo directory. That is the component-config.yaml file. This
would allow us to define the basic endpoint details about our service like, service name, exposed port, context and visibility of the project.
apiVersion: core.choreo.dev/v1beta1
kind: ComponentConfig
spec:
  inbound:
    # +required Unique name for the endpoint. (This name will be used when generating the managed API)
    - name: Demo Service
      # +required Numeric port value that gets exposed via the endpoint
      port: 8080
      # +required Type of traffic that the endpoint is accepting. For example: REST, GraphQL, etc.
      # Allowed values: REST, GraphQL, GRPC, TCP, UDP.
      type: REST
      # +optional Network level visibility of the endpoint. Defaults to Public
      # Accepted values: Project|Organization|Public.
      networkVisibility: Public
After creating this file, add and commit this to the .choreo/component-config.yaml
Then, navigate inside the project and click create - create service .
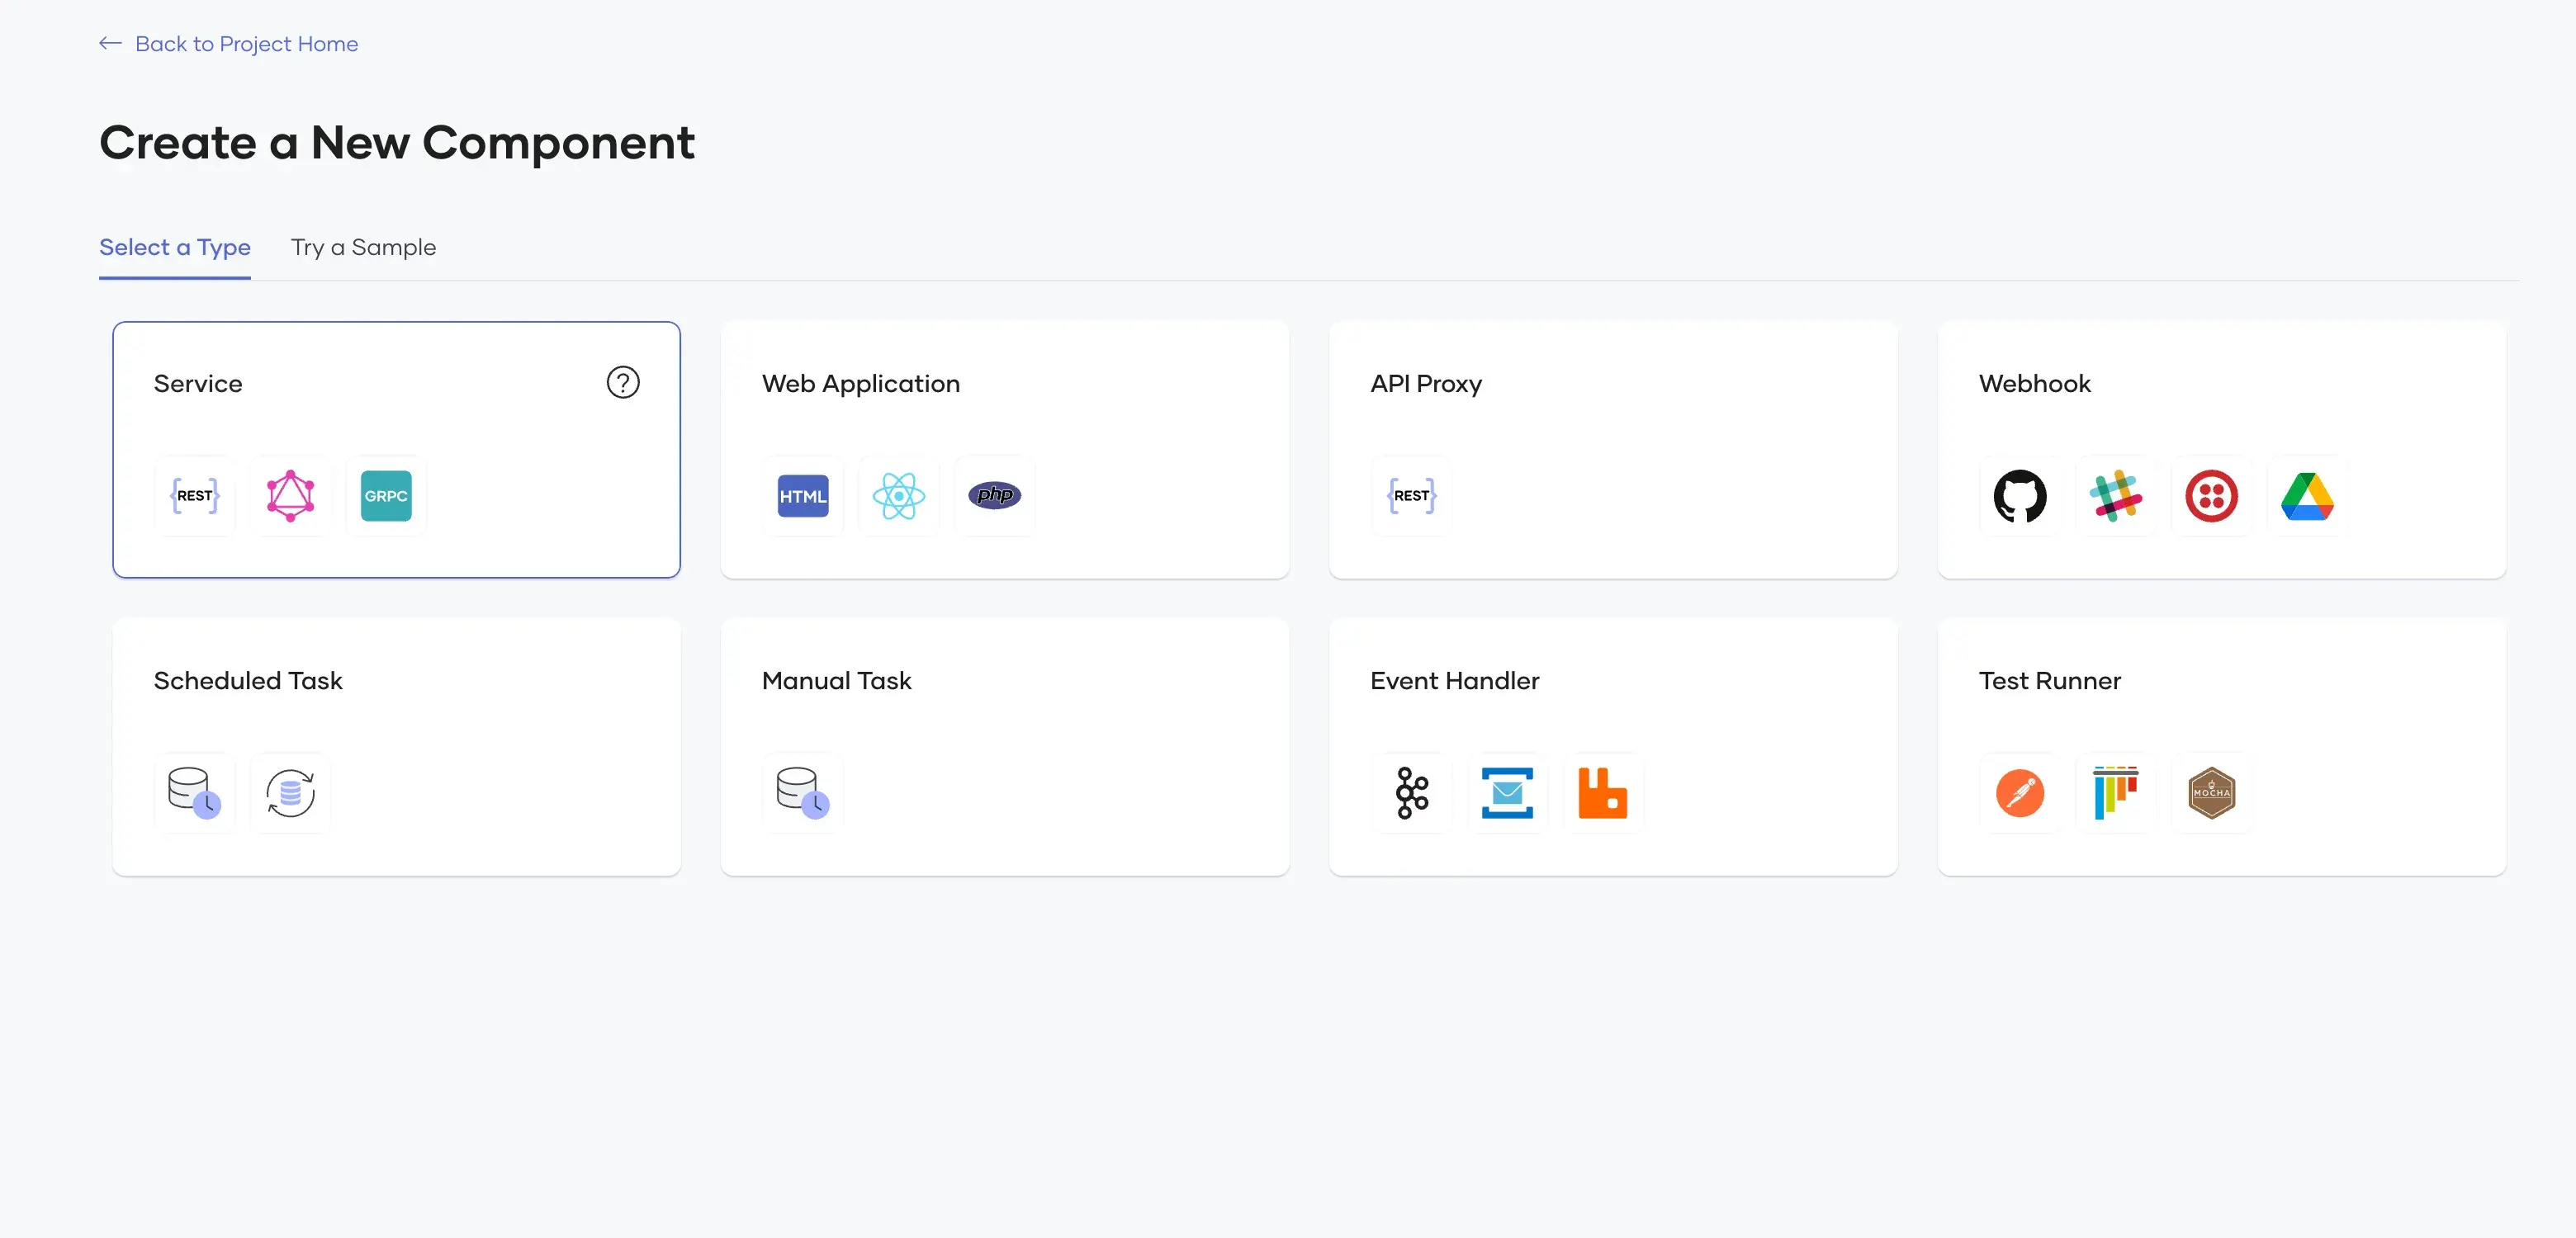
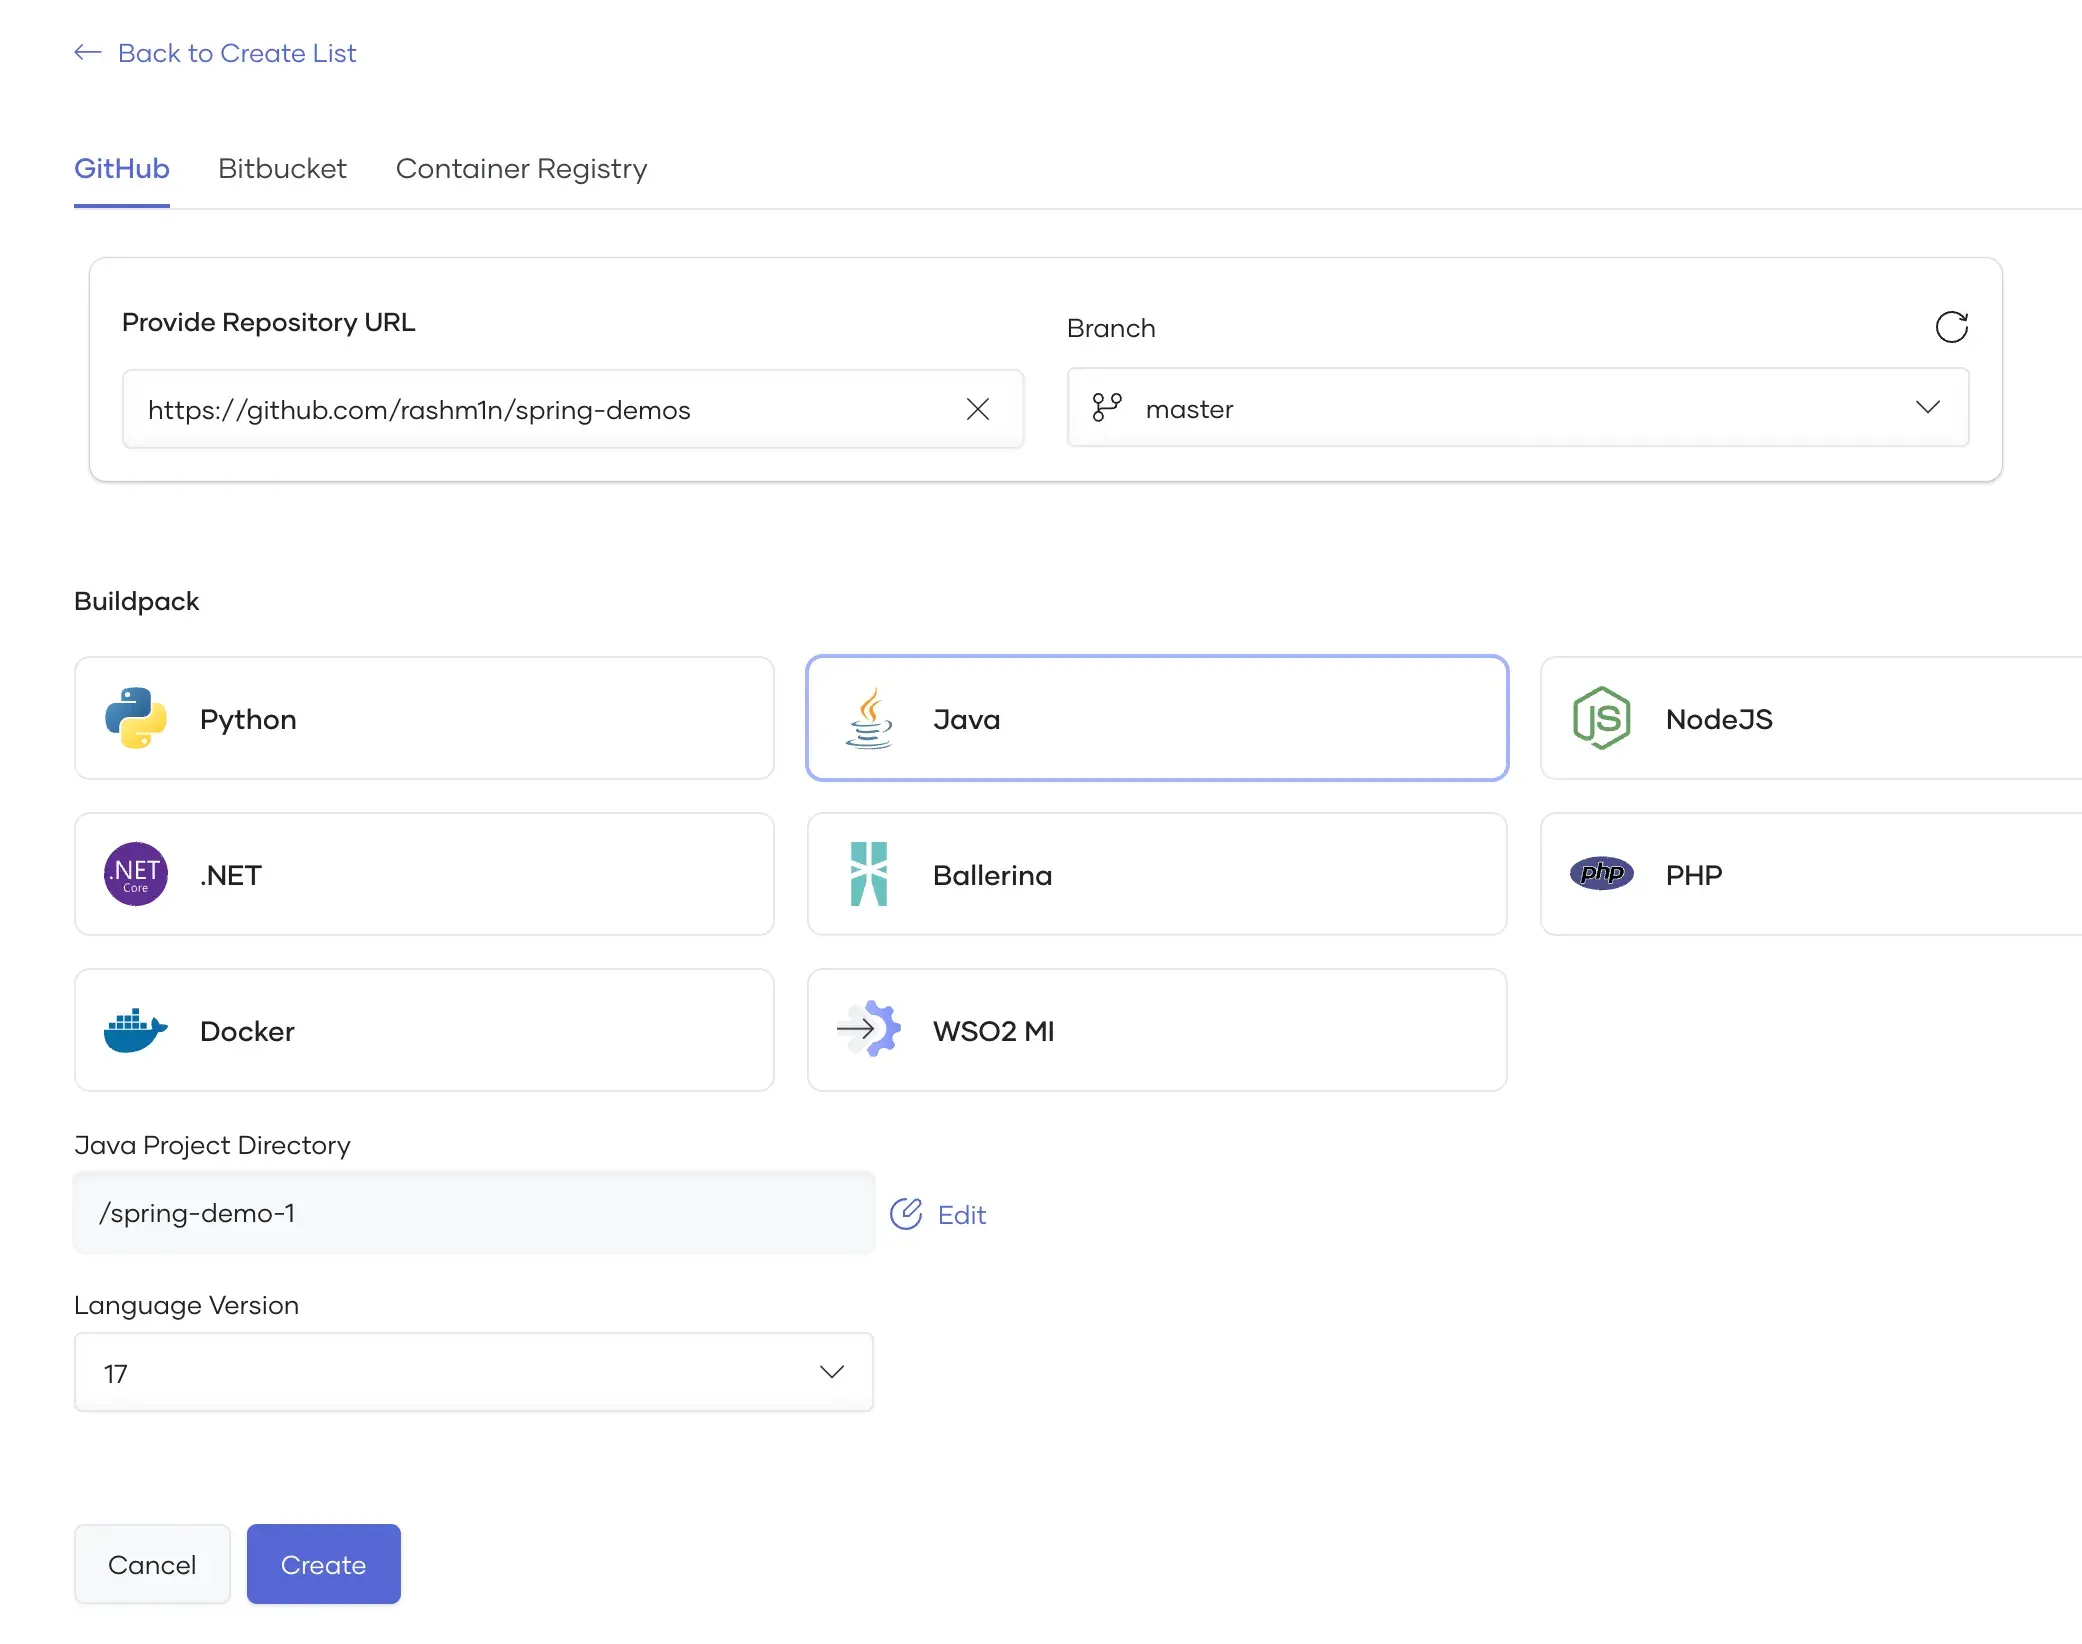
Then enter the below details and chose the Java option, Java version and project directory and then click create. Choreo will create the component.
Building and Deploying the Component
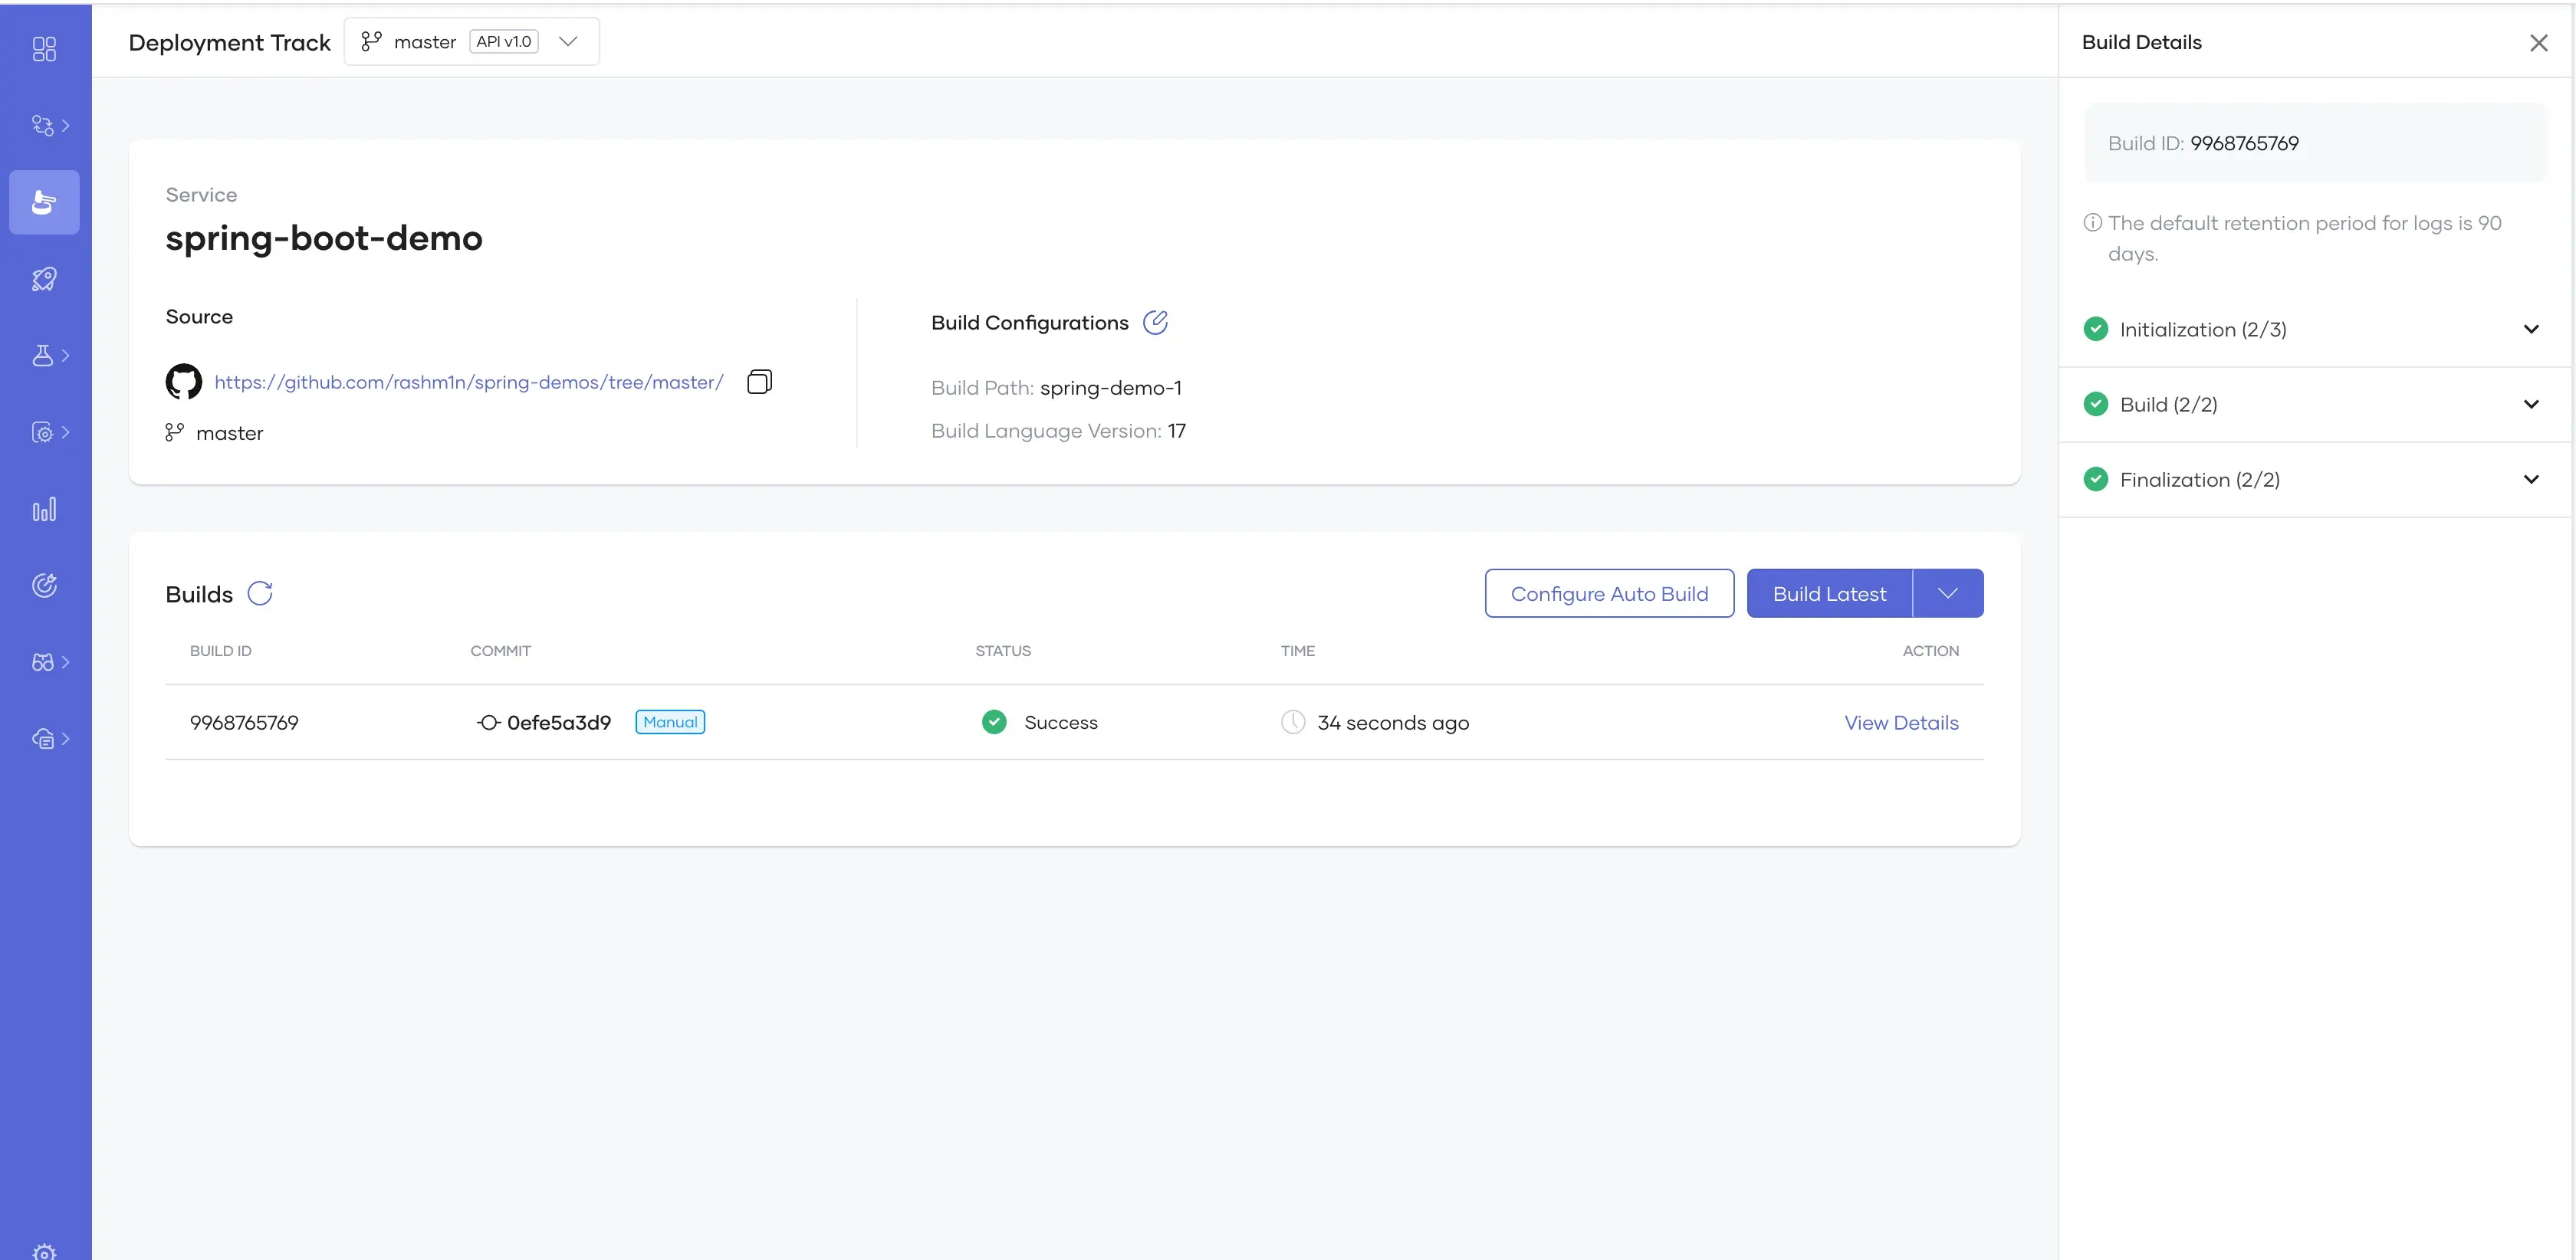
After the component creation is complete, we need to build the component and deploy it. Building would create a docker image using a java build pack and add it to internal container registries.
To build the application navigate to the left side pane and and go to the Build menu. Inside that, click Build Latest which would build
the latest commit to your repository.
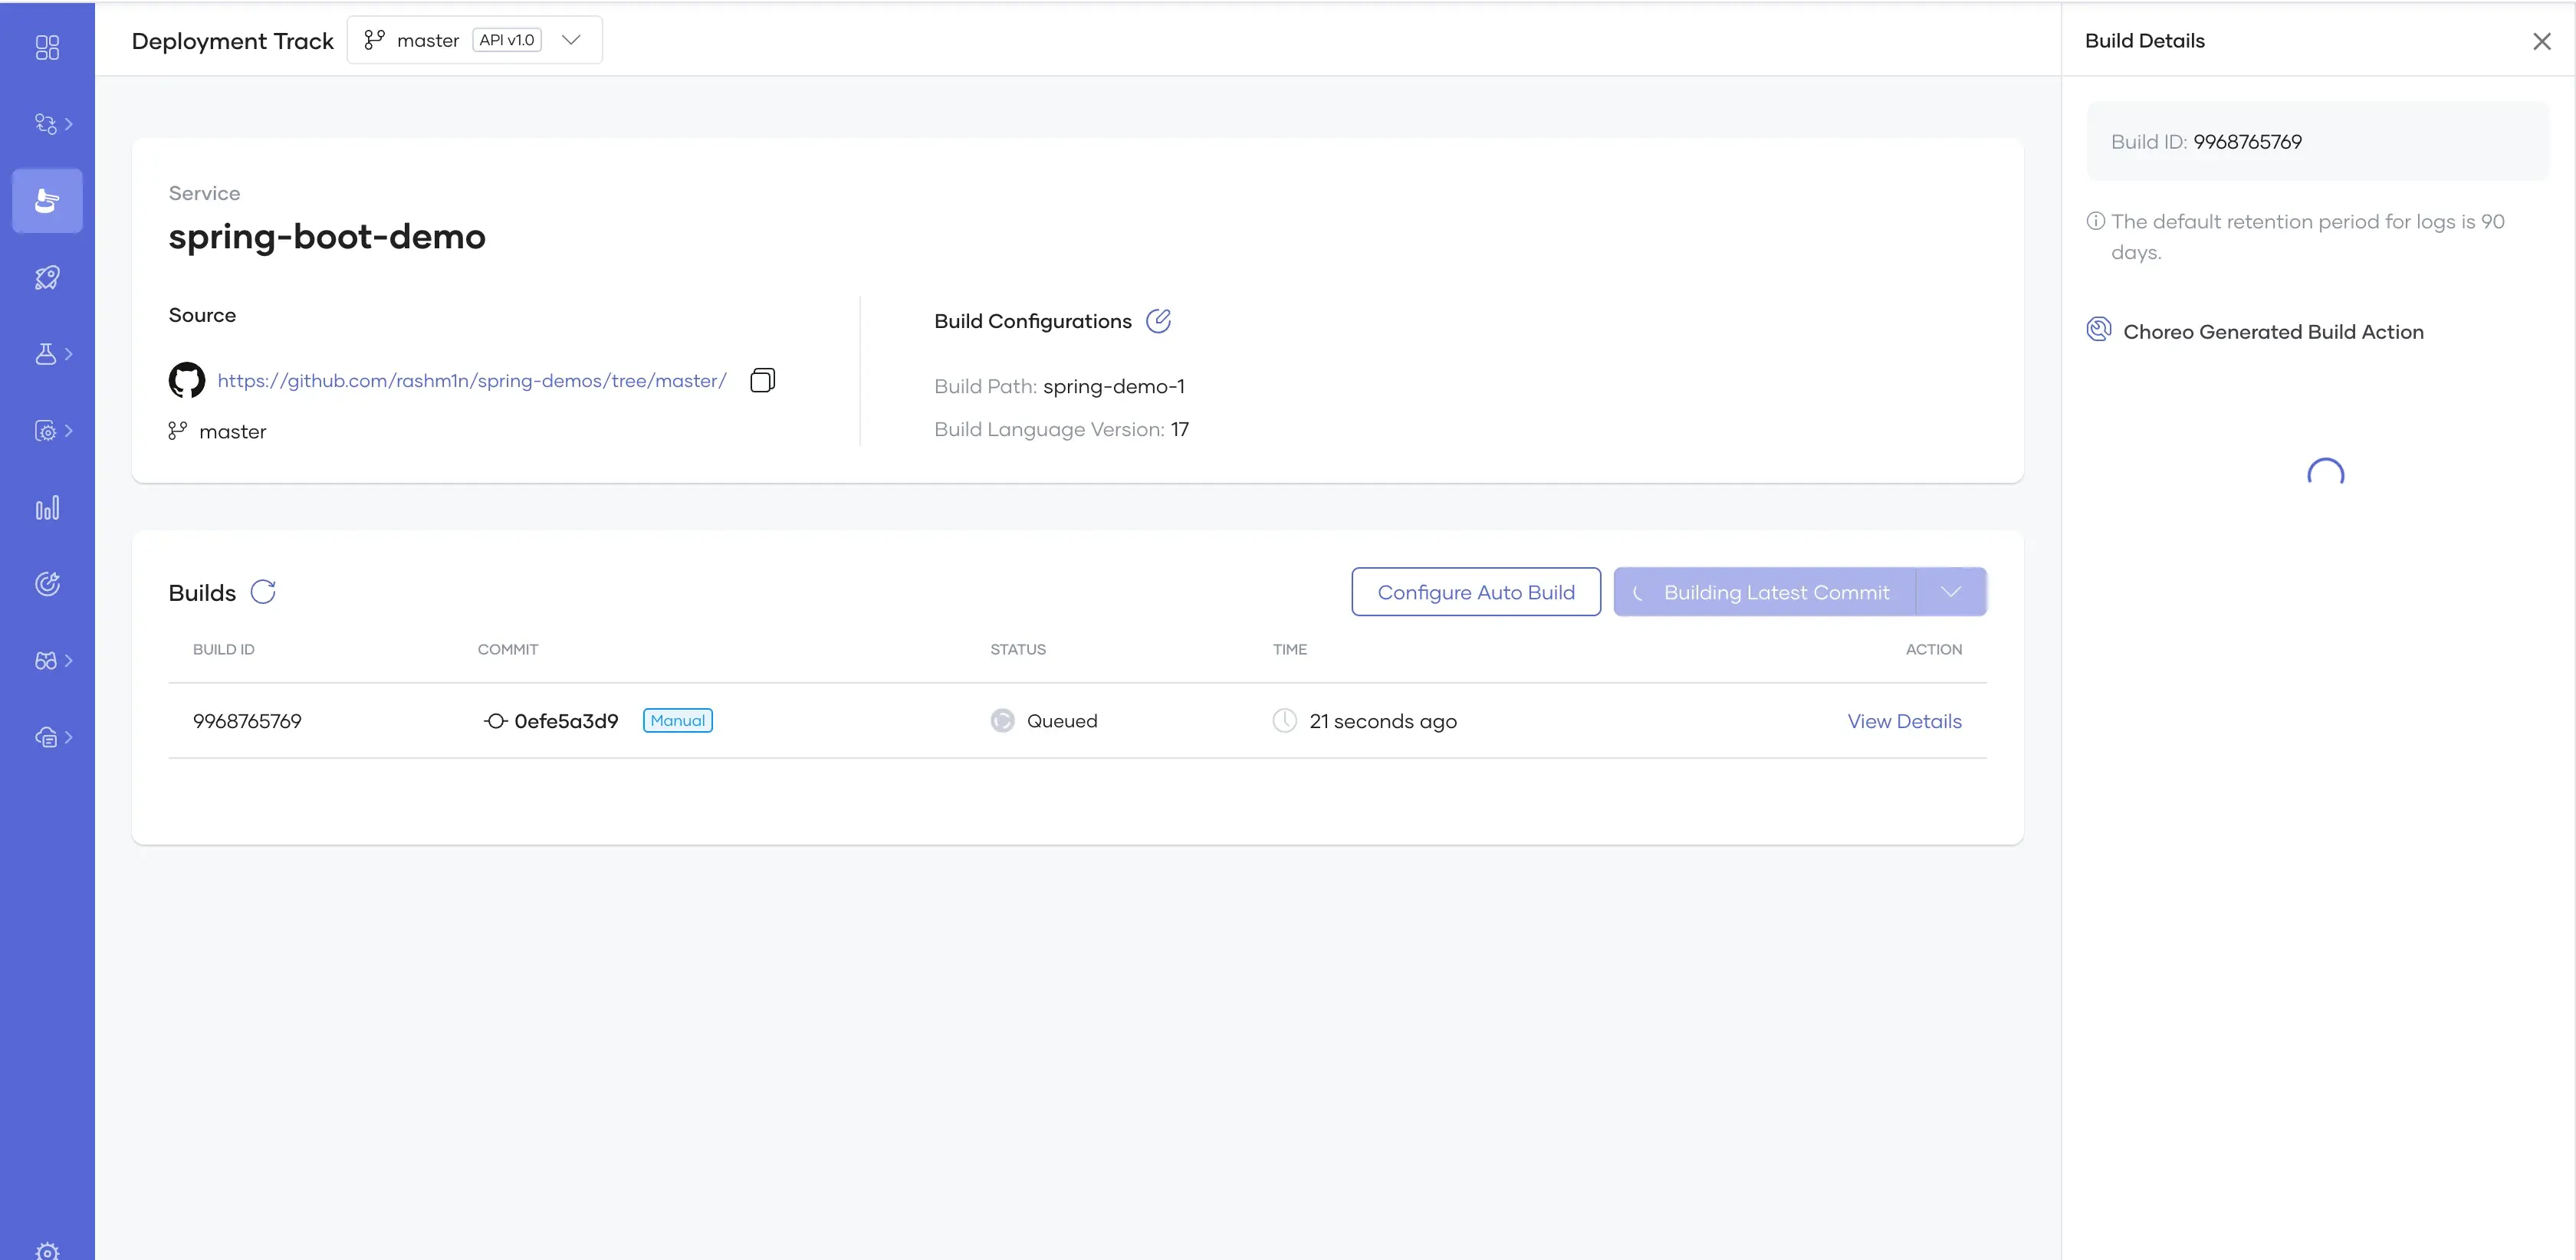
If there are no errors with your code and it has no security vulnerabilities, the build would complete successfully.
After that navigate to the Deploy menu on the left pane. This would allow us to deploy the built application to two separate environments, Development and
Production. Let’s deploy it to the Development environment by clicking Configure and Deploy . You could skip adding environment variables
and File Mounts and click Deploy from the right pane.
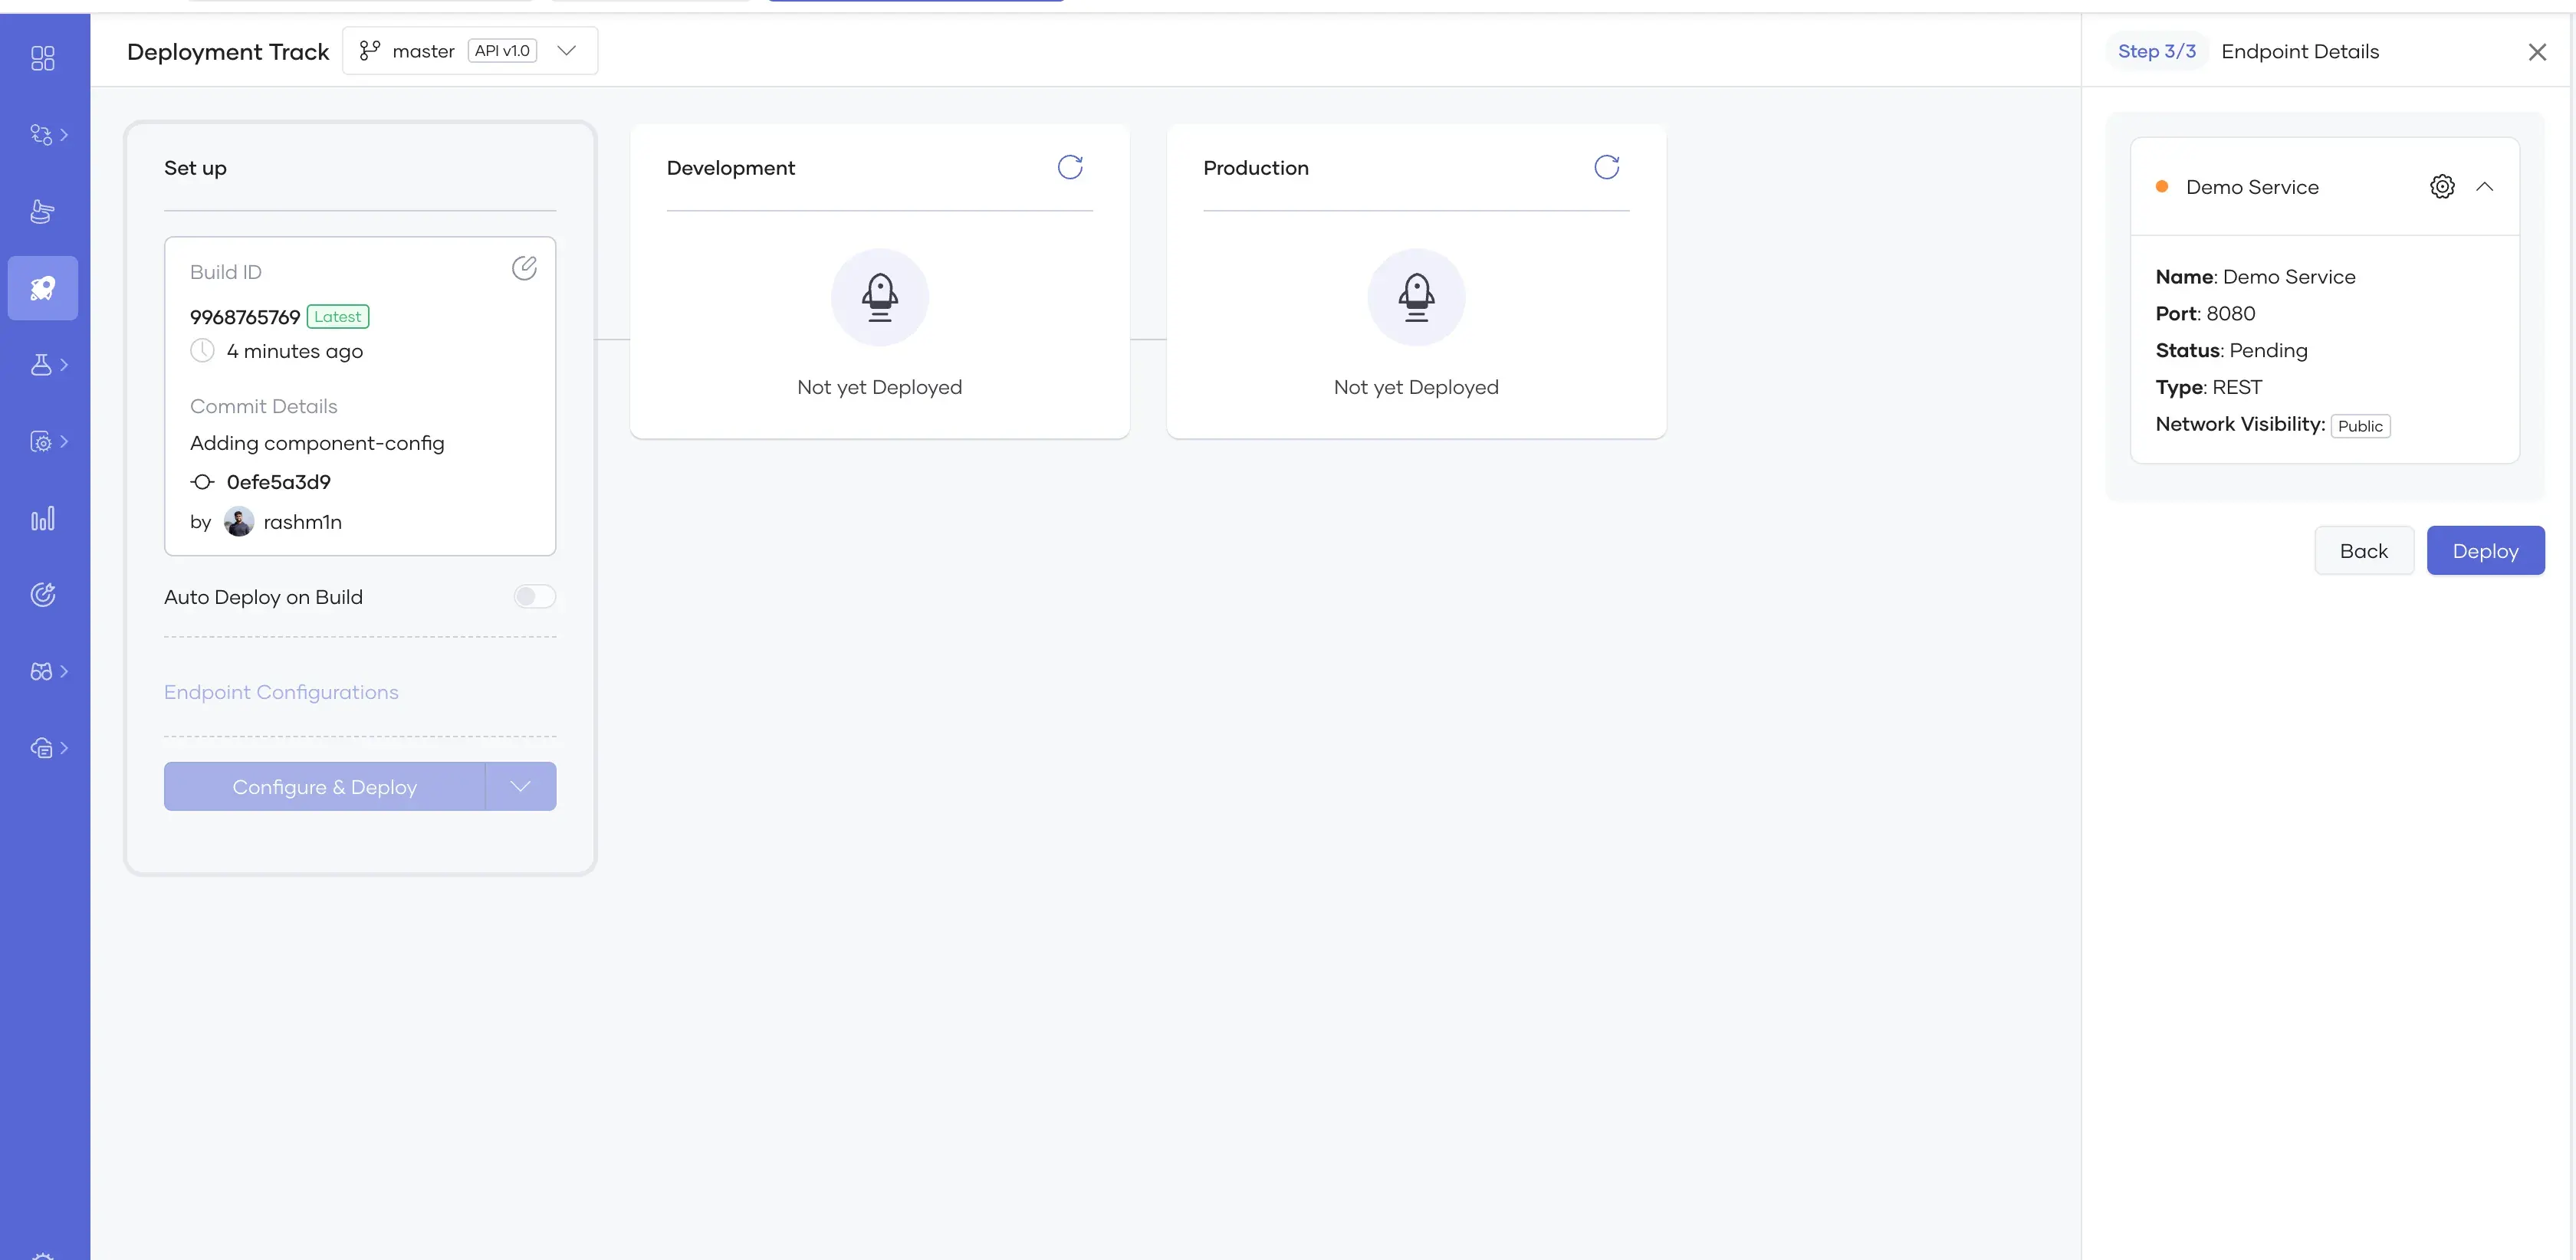
After a few seconds your spring application would be up and running in a cloud environment !
By default your deployed applications would be protected by OAuth2 in Choreo which is an added advantage. You dont need to spin up your own authentication or use any other outside authentication providers.
To test the application, you can navigate into the Test -> API Console menu in the left side pane, where you can generate a Test Key and invoke the API.
In the Test menu, click Get Test Key and then copy the test key. Then you could utilize that test key and use the following curl commands to invoke your application.
The INVOKE-URL can be copied from the same page.

curl -v -X 'POST' \
  'https://<YOUR-INVOKE-URL>/api/demo' \
  -H 'accept: application/json' -H 'Content-Type: application/json' \
  -H 'API-Key: <YOUR-API-TEST-KEY>' -d '{"id": 1, "name": "demo1"}'
curl -X 'GET' \
  'https://<YOUR-INVOKE-URL>/api/demo/1' \
  -H 'accept: application/json' \
  -H 'API-Key: <YOUR-API-TEST-KEY>'
And just like that, your spring application is deployed into a cutting edge kubernetes based internal developer platform in just minutes! You could add a lot of additional features on top of this deployment like rate limiting, security configs, publishing the application and many more. This is just the tip of the iceburg !! You could visit the Choreo Docs to learn more about Choreo and its feaures. Hope you enjoyed the article and please hit me up on social media for any questions !